Add a Building
If you are a registered user, login. If not, you may registered by clicking on Join for Free.
After you have logged in, click on your email in the upper right hand corner of the screen to open the menu, and then select Properties.

A new menu has appeared on the left side of the screen. Under Properties you will see a choice for Sites, Buildings, and Contacts.
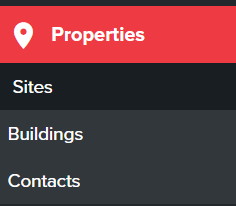
Select Buildings and click Add New to begin entering information on the Create New Building Location page.
![]()
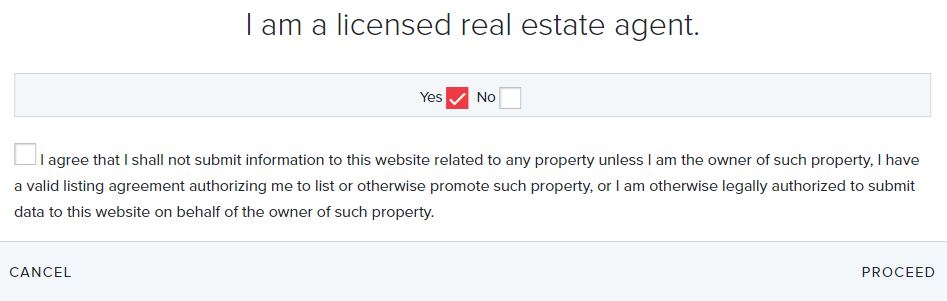
A question is displayed to ask if you are a real estate agent. Select the appropriate box and click Proceed to continue.

The building location page is where you will enter information that applies to the entire building (i.e., building name, address, property boundary, proximity to transportation, etc.)
Scroll down on the page to see a map to draw the property boundary.

Pan and zoom to the correct area of the map and click the Pencil tool in the upper left corner of the map to open the boundary drawing and editing tools.

Select the Plus sign to add a boundary, the Triangle to edit a boundary, and the Trash Can to delete a boundary. When you are finished adding, editing, or deleting your boundary, click Save to save your changes.

![]()
Add a boundary – select the Plus sign, click to add the first point, then again for subsequent points. Double click or click the Check to complete the drawing. You may draw multiple boundaries for adjacent lots. You must click Save for your changes to be saved.

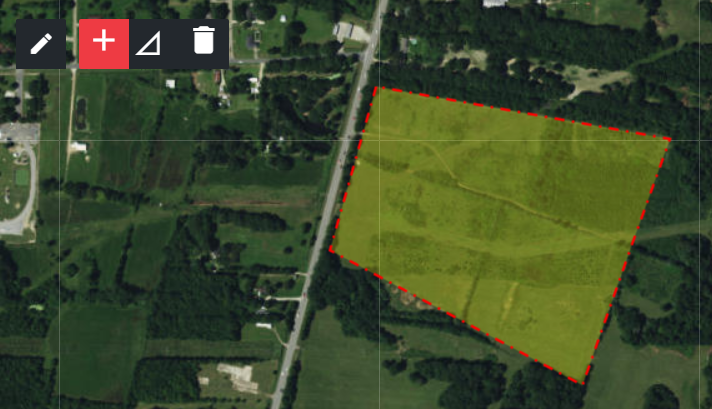
Edit a boundary – select the Triangle and click on the boundary you want to edit. Click and drag the points around and complete the editing by clicking the Check. You must click Save for your changes to be saved.

Delete a property – select the Trash Can and click the boundary you want to delete. You must click Save for your changes to be saved.
Scroll down until you see the Transportation and Details tabs. The transportation is already filled in as it was calculated from the property boundary. You may edit this information and add additional transportation information. Then complete the Details tab.
![]()
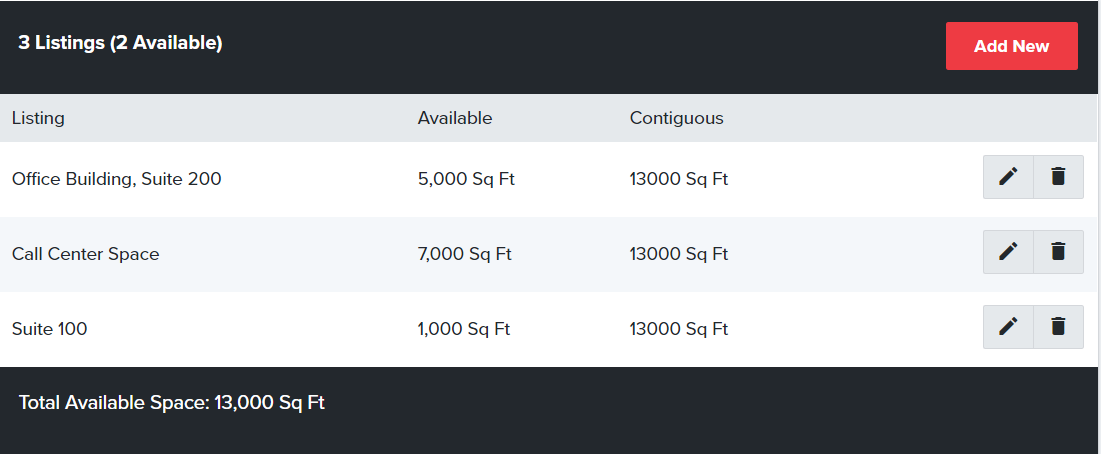
The Listing section, which is just below the map, is where you will open the Listing Page to enter the remaining information. You may have multiple listings within each location (i.e., suites in same building, several buildings on same lot). To begin, select the Edit Pencil next to the “Unnamed” blank listing. To add additional listings to this location, select Add New.
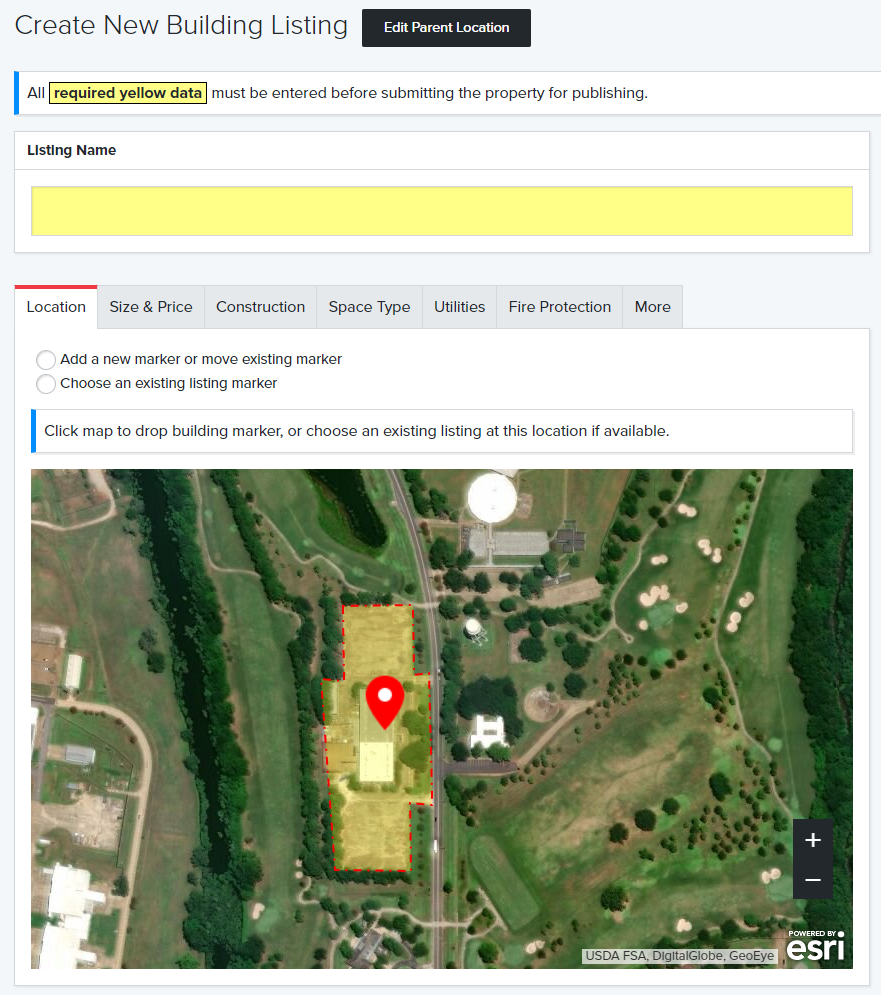
You are now on the Create New Building Listing page. The information is organized into tabs. Click each tab and enter information into each section. There is a Save button on the right that you may click at any time to save your work.
![]()
The Location tab contains a map that displays the property boundary you created in a previous step. Now, you will mark the location of the building. Select Add a New Marker or Move Existing Marker and click the building on the map to add the marker. If a marker already exists over the building, then click Choose an Existing Listing Marker.
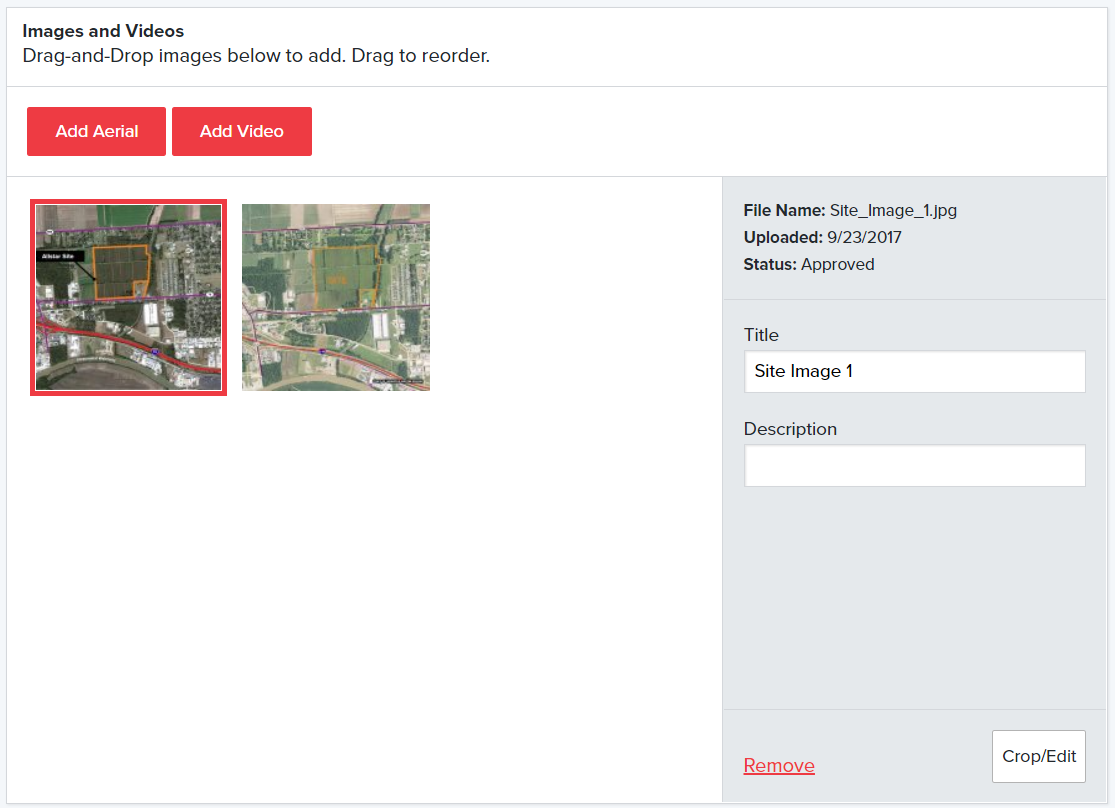
Below the boundary map is a section for Images and Videos.
To add an image, drag and drop it or double click and browse to select it. After it has uploaded, click on it enter a Title and Description. You may drag and drop multiple images.
To add a video, select Add Video and enter the URL of either a video that is on YouTube or Vimeo. You may add multiple videos.
The next section, as you scroll down the page, is Files. To add a file drag and drop it or double click and browse to select it. After it has uploaded, click on it enter a Title and Description. You may drag and drop multiple files.
Now enter a description of the property. This information will appear on the front page of the flyer, so please enter a few paragraphs
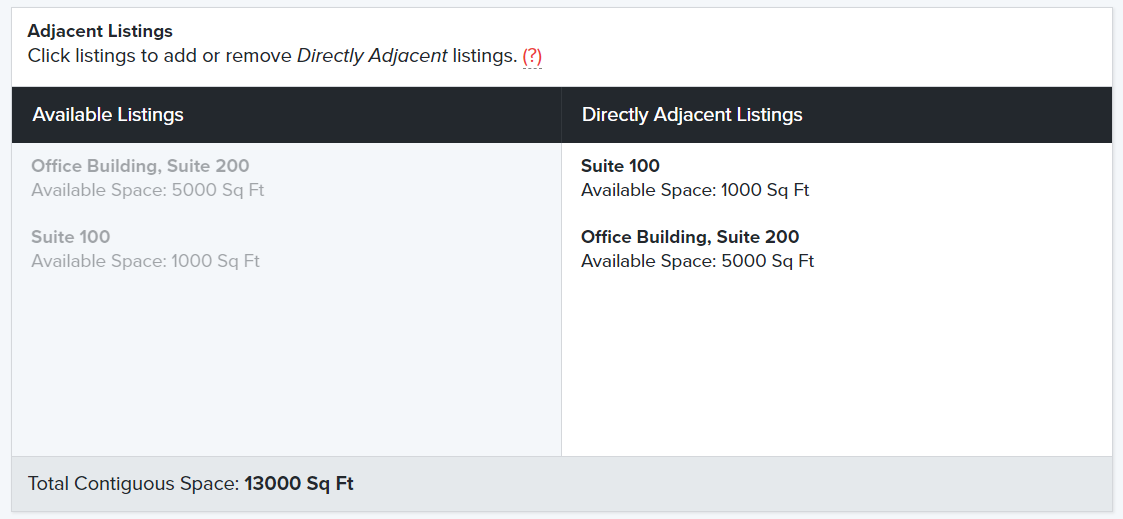
The next section, Adjacent Listings, allows you to indicate if another listing is adjacent to this listing. The left window contains other available listings in the building. Click on the listing to move it to the right window to indicate that it is adjacent.
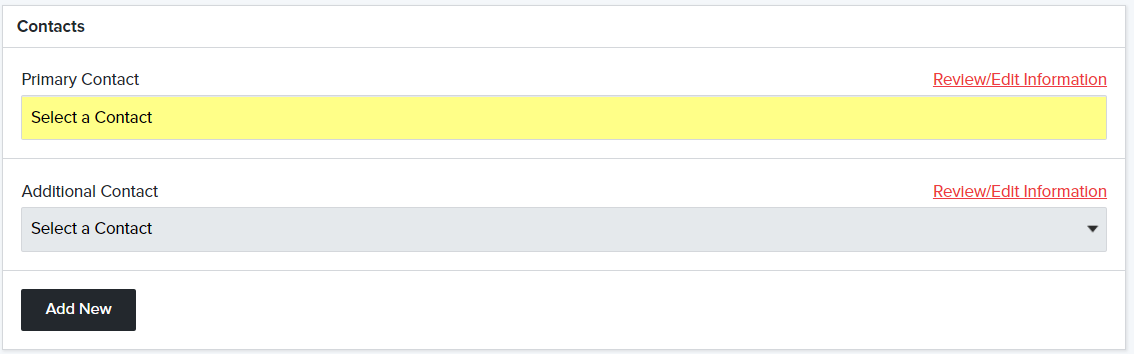
Next, select a Primary Contact and an optional Secondary Contact from the drop down boxes. If the contact you wish to add is not in the drop down list, you may add them by clicking on Add New. To edit the information of an existing contact select Review/Edit Information.
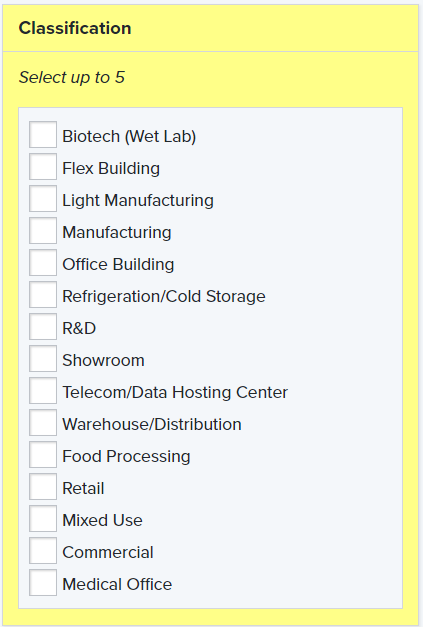
Now scroll to the top and look to the right to see a list of Classifications to choose from. You may select up to five.
Remember to click Save on the right hand side to save all your changes. Select View Detail Flyer at the top to preview your property flyer. When you are ready to submit your property click on Submit.

The property will be submitted for approval and you will receive an email confirming your property has been approved. If there is a problem with the information, you will receive a decline email will instructions to correct the issue.